GitLab Integration
GitLab comes with a native Gitpod integration. This feature is enabled on GitLab.com by default, but needs to be enabled by the administrator of a GitLab self-managed instance as described in the GitLab docs.
Starting Workspaces
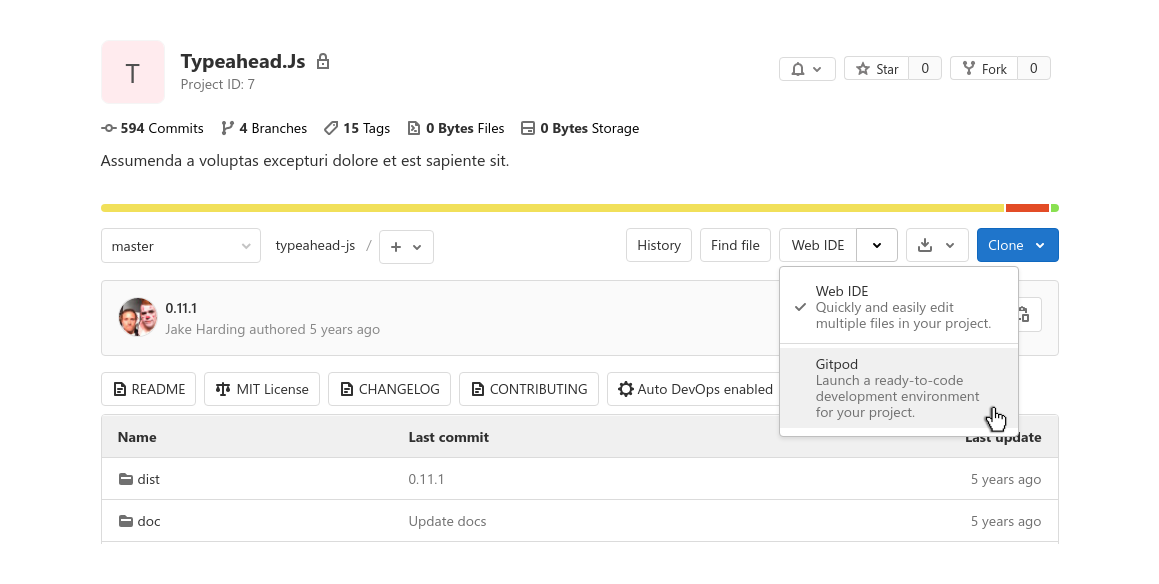
When the Gitpod integration is enabled in GitLab, users can choose to start a Gitpod workspace as an alternative to the GitLab Web IDE directly from GitLab. Simply click on the dropdown arrow next to the Web IDE split button on the project or merge request page, and choose “Gitpod”. The Gitpod workspace will open in a new browser tab. Then, the next time you visit a GitLab page, the last used action will be pre-selected.

To launch new Gitpod workspaces for issues, branches, specific commits, etc. you can also prefix any GitLab URL with gitpod.io/# as described in the Getting Started page, or use the browser extension to add a convenient Gitpod button to every GitLab page.
Enabling Prebuilds
To enable prebuilt workspaces for your GitLab project you need to grant allow api calls in Gitpod’s Access Control page. This allows Gitpod to install a webhook. The webhook creates a new prebuild for every push event.
The webhook will be automatically installed when you trigger the first prebuild manually. For this, prefix your GitLab project URL with gitpod.io/#prebuild/ as described in the prebuilds page.
OAuth Application
In Gitpod you can register your own GitLab OAuth application. This allows to use Gitpod with any GitLab instance.
Here’s how to do that:
- Head over to the settings and scroll to the section about
Git Provider.

- In the pop-up you choose GitLab as the type and type the host URL of the GitLab installation you want to use. If you want to hook up with the gitlab.com you can use that host as well, of course.

- The form for your GitLab integration now shows three values. The first one is the redirect URL, that you need to register on the GitLab side. Copy the redirect Url to your clipboard

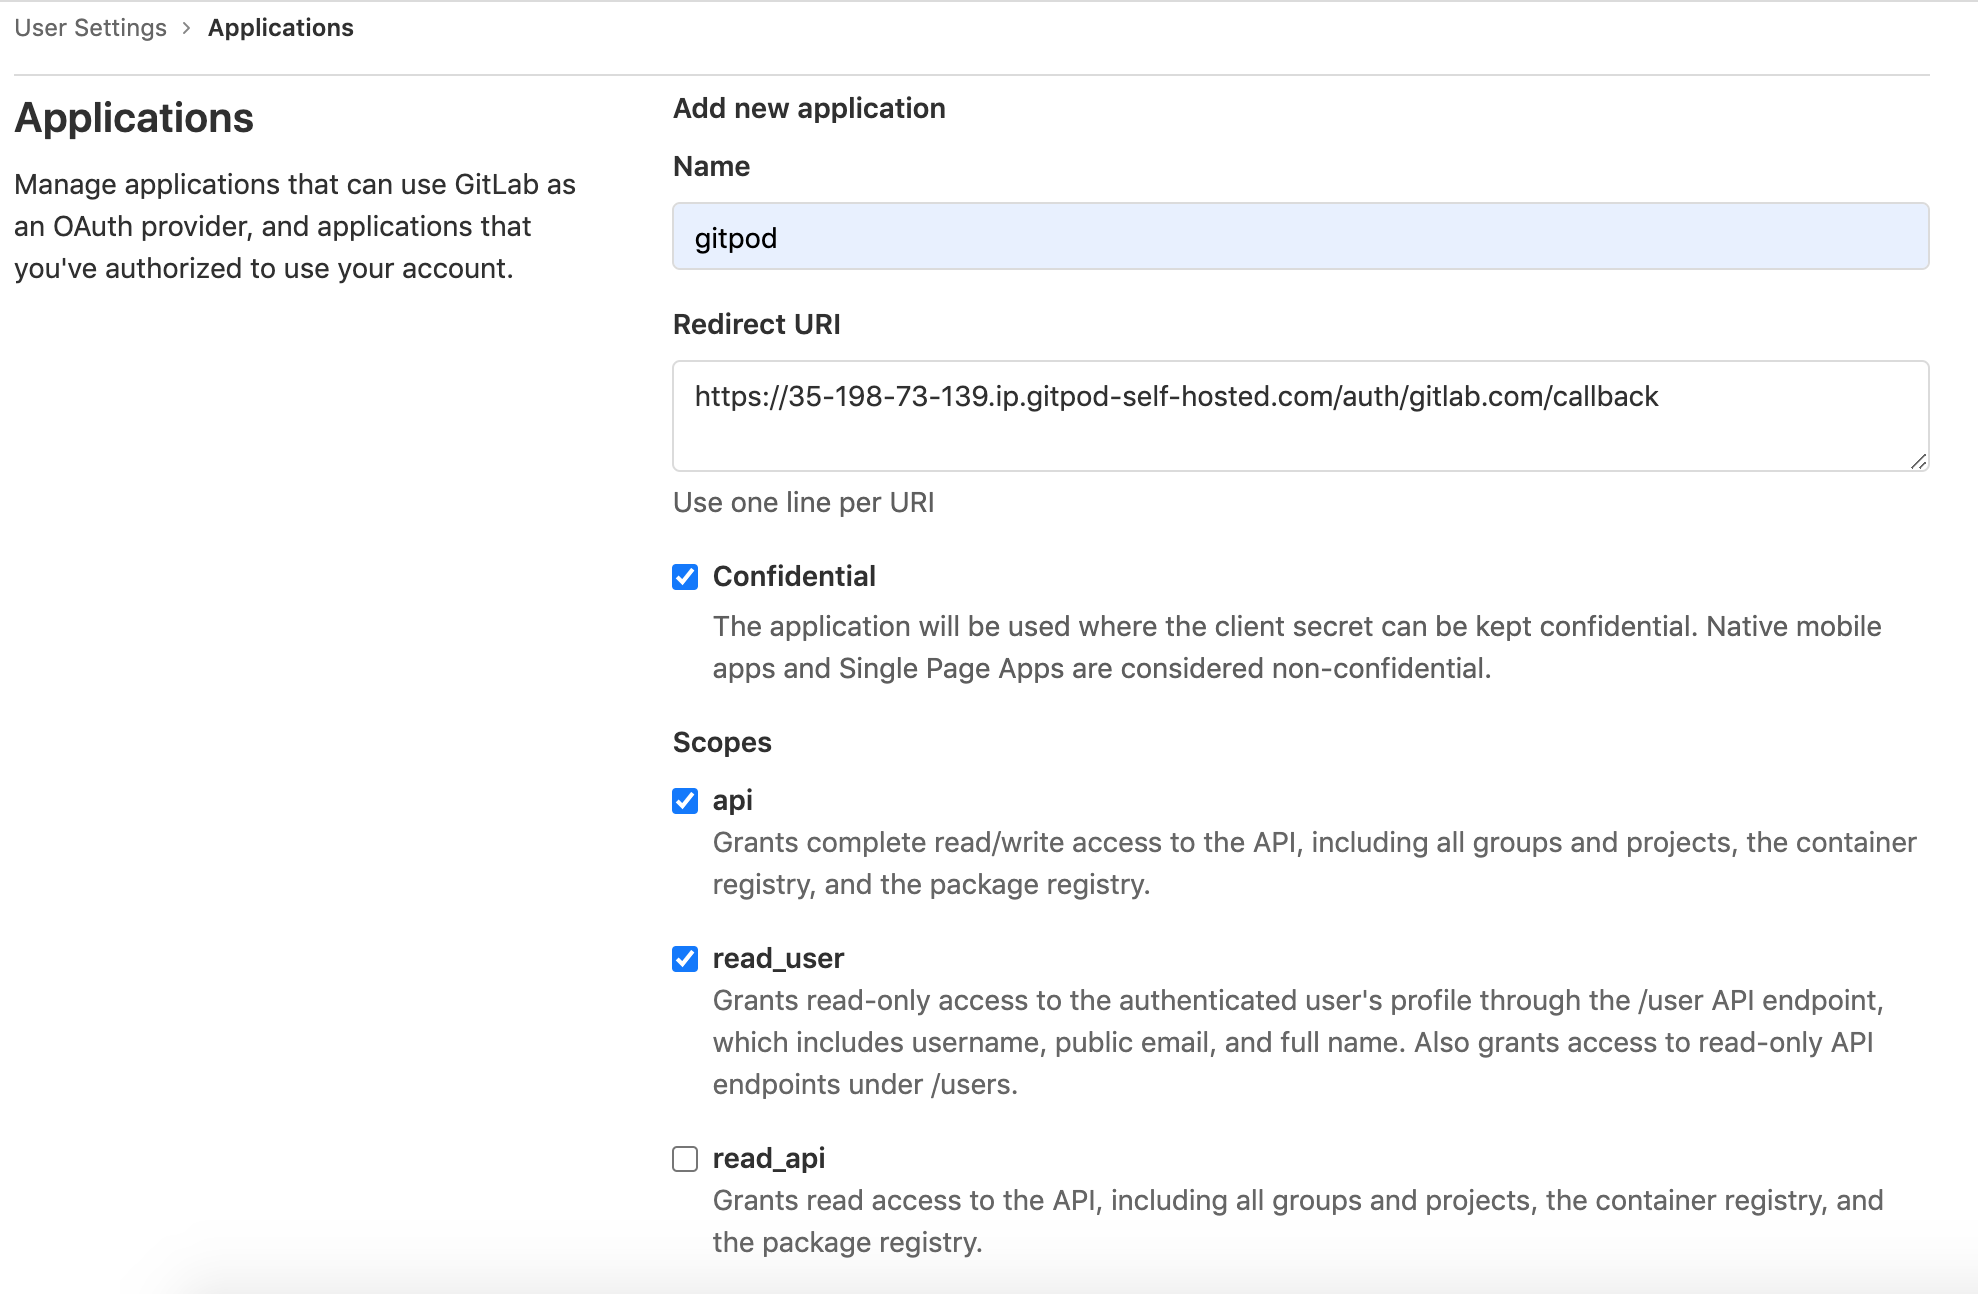
- Go to /profile/applications on your GitLab installation to create an OAuth App. Type in a name (e.g. Gitpod) and paste the Redirect URL in the corresponding text area. Check the scopes
apiandread_user. Click the button “Save Application” below.

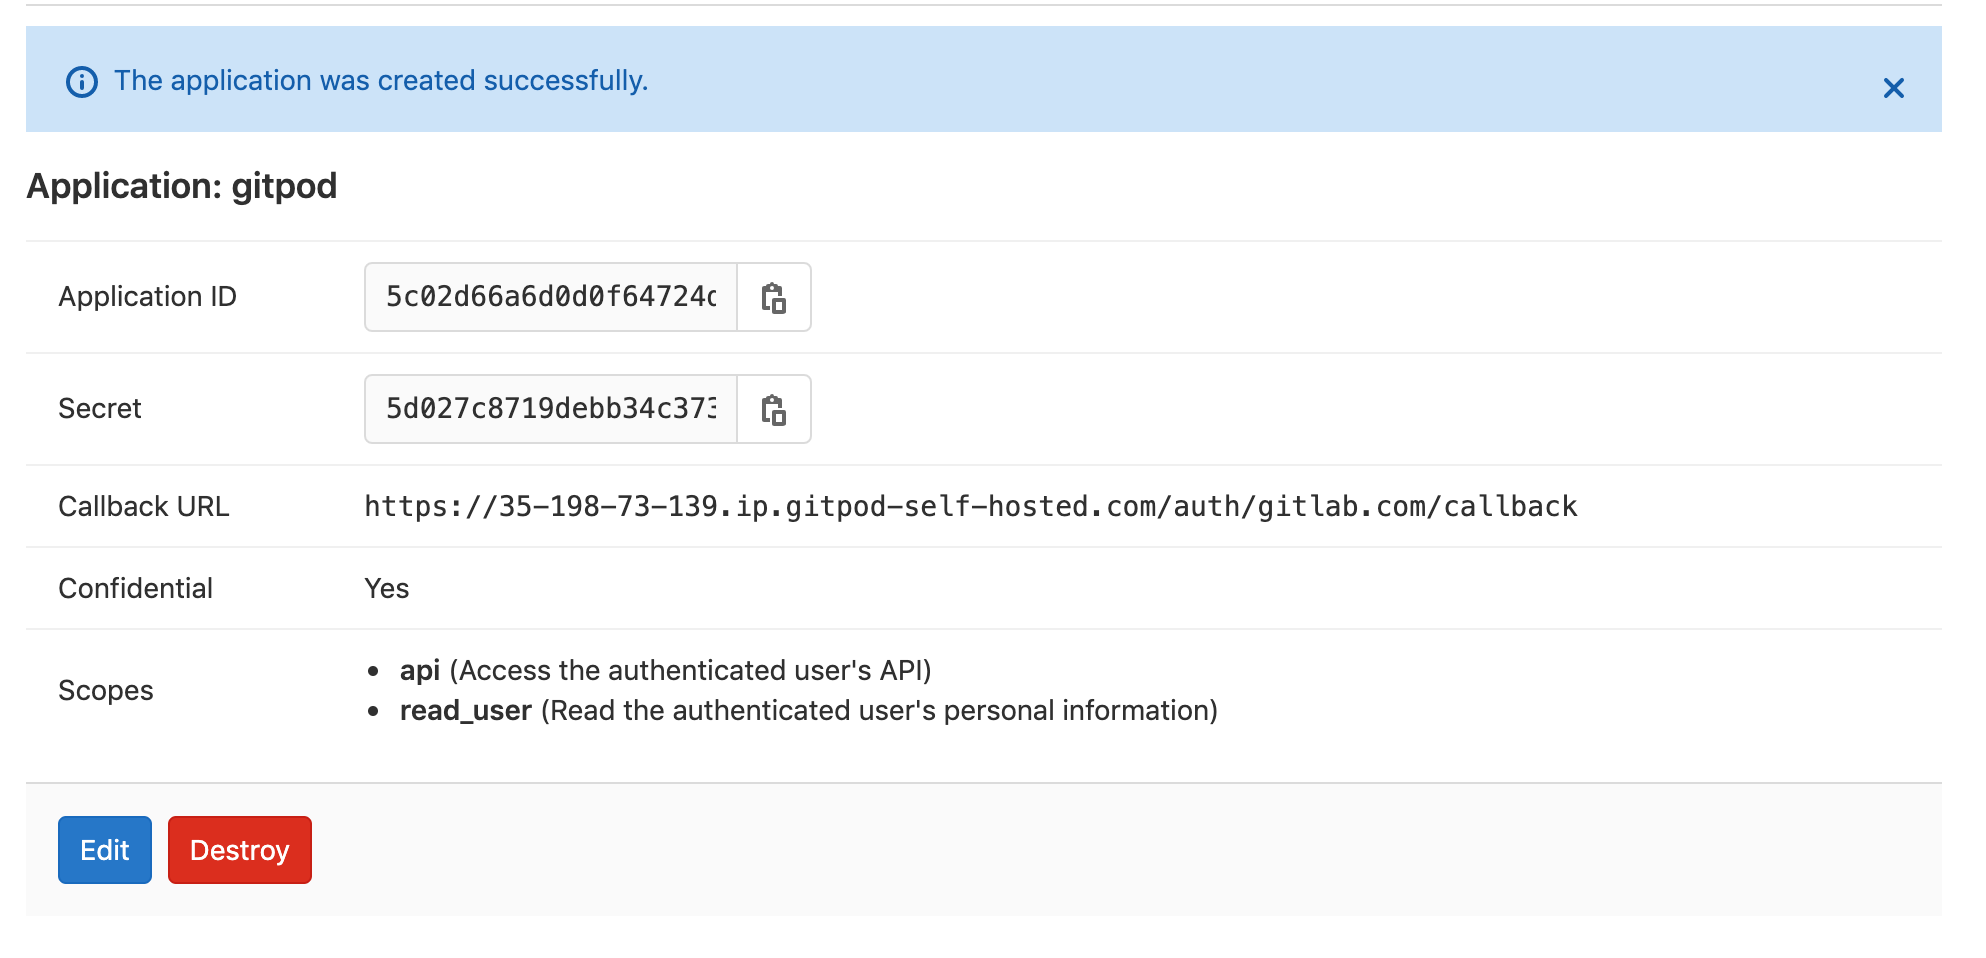
- Copy the
Application IDand theSecretin the corresponding form fields (Client IDresp.Client Secret) of your Gitpod installation.

- Press
Connectand go through the Auth flow the first time.
Congrats you have setup the GitLab integration. 🎉
Next up you should install the browser extension and configure it with your Gitpod installation URL.