Rust in Gitpod
Welcome, Rustacean!
Rust is a first-class language in Gitpod, and we believe that Gitpod is a great tool for Rust projects. Some of Gitpod’s core developers frequently work with Rust code (in Gitpod), and several key components of Gitpod are written in Rust:
- The fantastic language support is provided by the rls
- The blazing-fast workspace search is powered by ripgrep
Rust Version
Gitpod always comes with the latest available Rust toolchain pre-installed using rustup. (As of this writing, the Rust version is 1.52.0 and it’s updated semi-automatically on every official Rust release.)
You can also use rustup yourself in Gitpod in order to switch to a different Rust version, or to install extra components. See the the rustup book to learn more about rustup itself.
Note: If you try to use rustup in your repository’s .gitpod.Dockerfile, you might get the following error:
/bin/sh: rustup command not foundTo fix this, simply wrap the rustup command in a login Bash shell, like so:
RUN bash -cl "rustup toolchain install nightly"You can override this default by committing a rustup-toolchain file in the root of your repository. Say for example you need the nightly compiler for March 4th, 2020, you would create a rustup-toolchain file and add the following
nightly-2020-03-04which will set the required Rust version and if you commit the file into source control it will set the default nightly version across all workspaces.
Example Repositories
Here are a few Rust example projects that are already automated with Gitpod:
| Repository | Description | Try it |
|---|---|---|
| Nushell | A next-gen shell for the GitHub era | |
| MathLang | Basic maths language in Rust | |
| Servo | The Servo Browser Engine |
VSCode Extensions
The most popular Rust VSCode extensions are already pre-installed in Gitpod. But here are a few “nice to have” extensions you may choose to install as well.
In order to install one of these extensions for your repository, simply head to Gitpod’s Extensions panel (find it in the IDE’s left vertical menu), then search for the desired extension by name, and install it for your project. This will add an entry to your .gitpod.yml file that ensures all future Gitpod workspaces for your repository will already have this extension pre-installed.
Rust Test Explorer
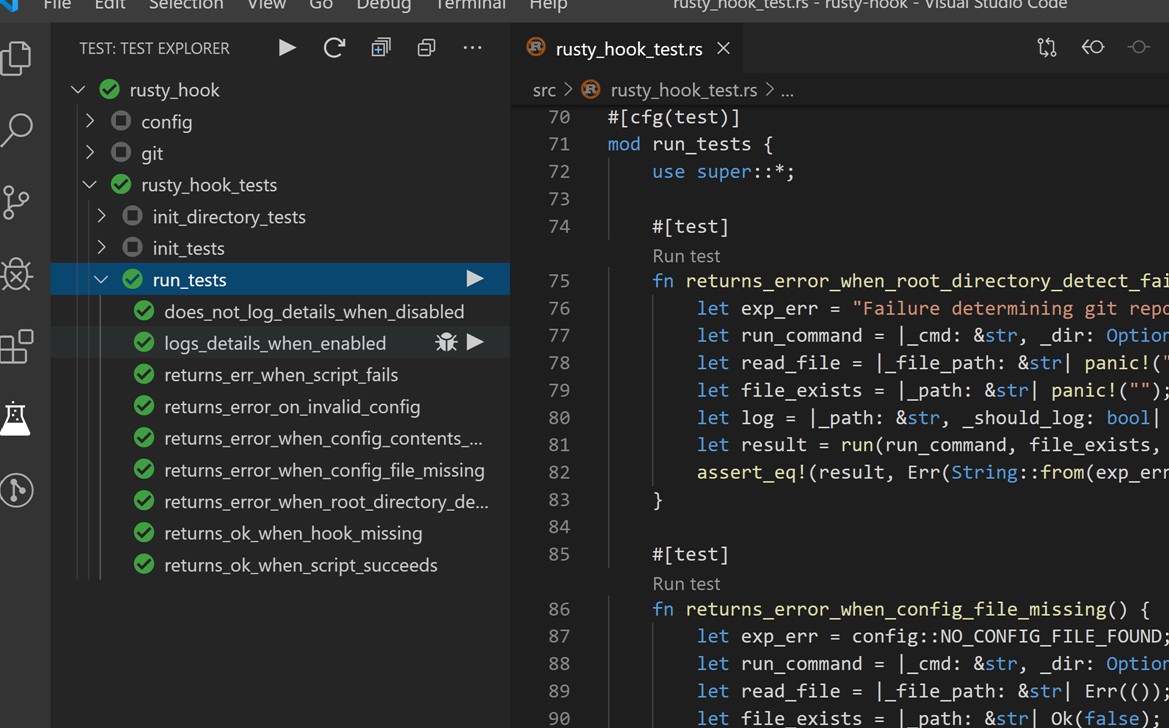
The Rust Test Explorer makes it easy to run Rust tests.
Crates
Note: This extension outputs emojis by default if the crate version is set at the latest. You can disable this by using
crates.upToDateDecoratoroption in your preferences >
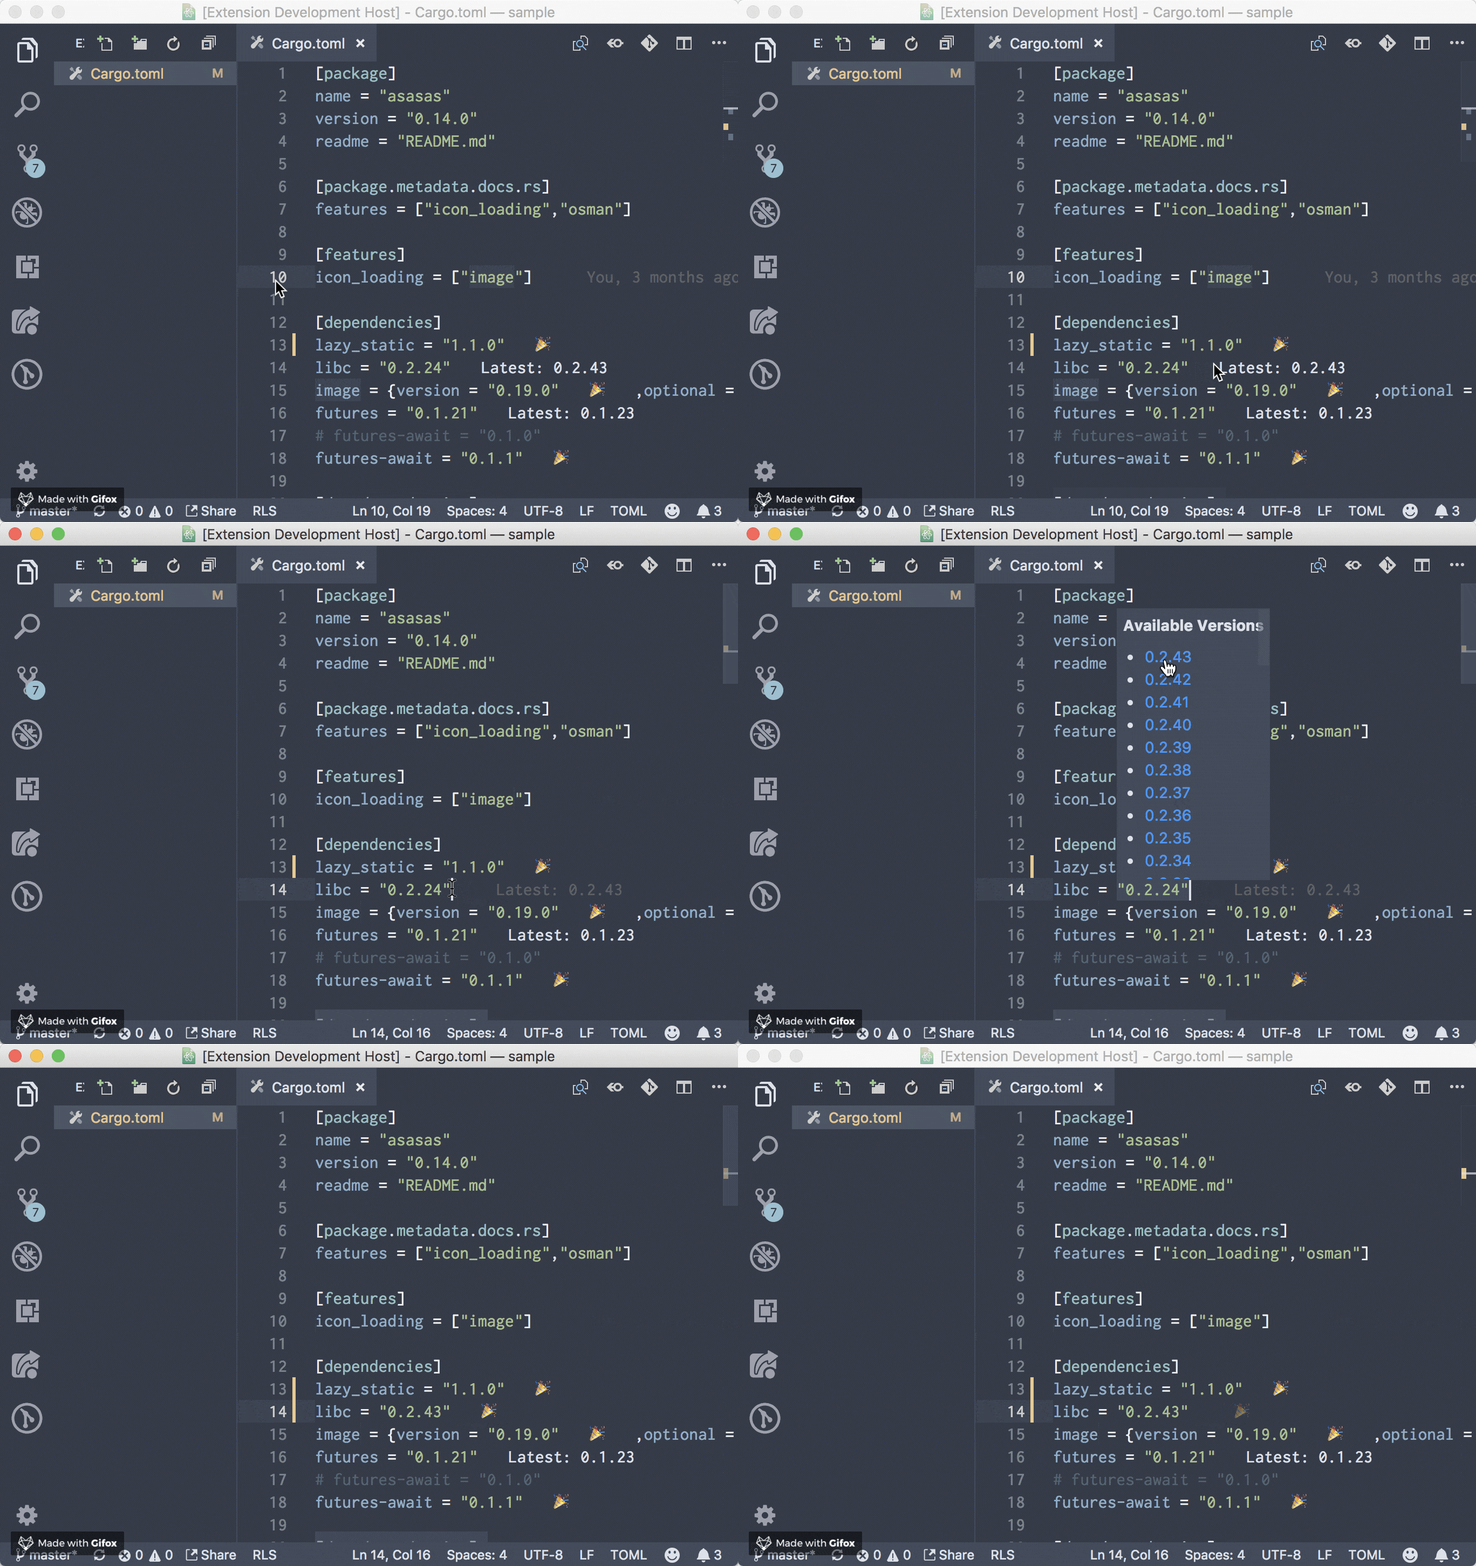 The VSCode extension Crates makes it easier to manage your Cargo dependency versions.
Search Crates.io
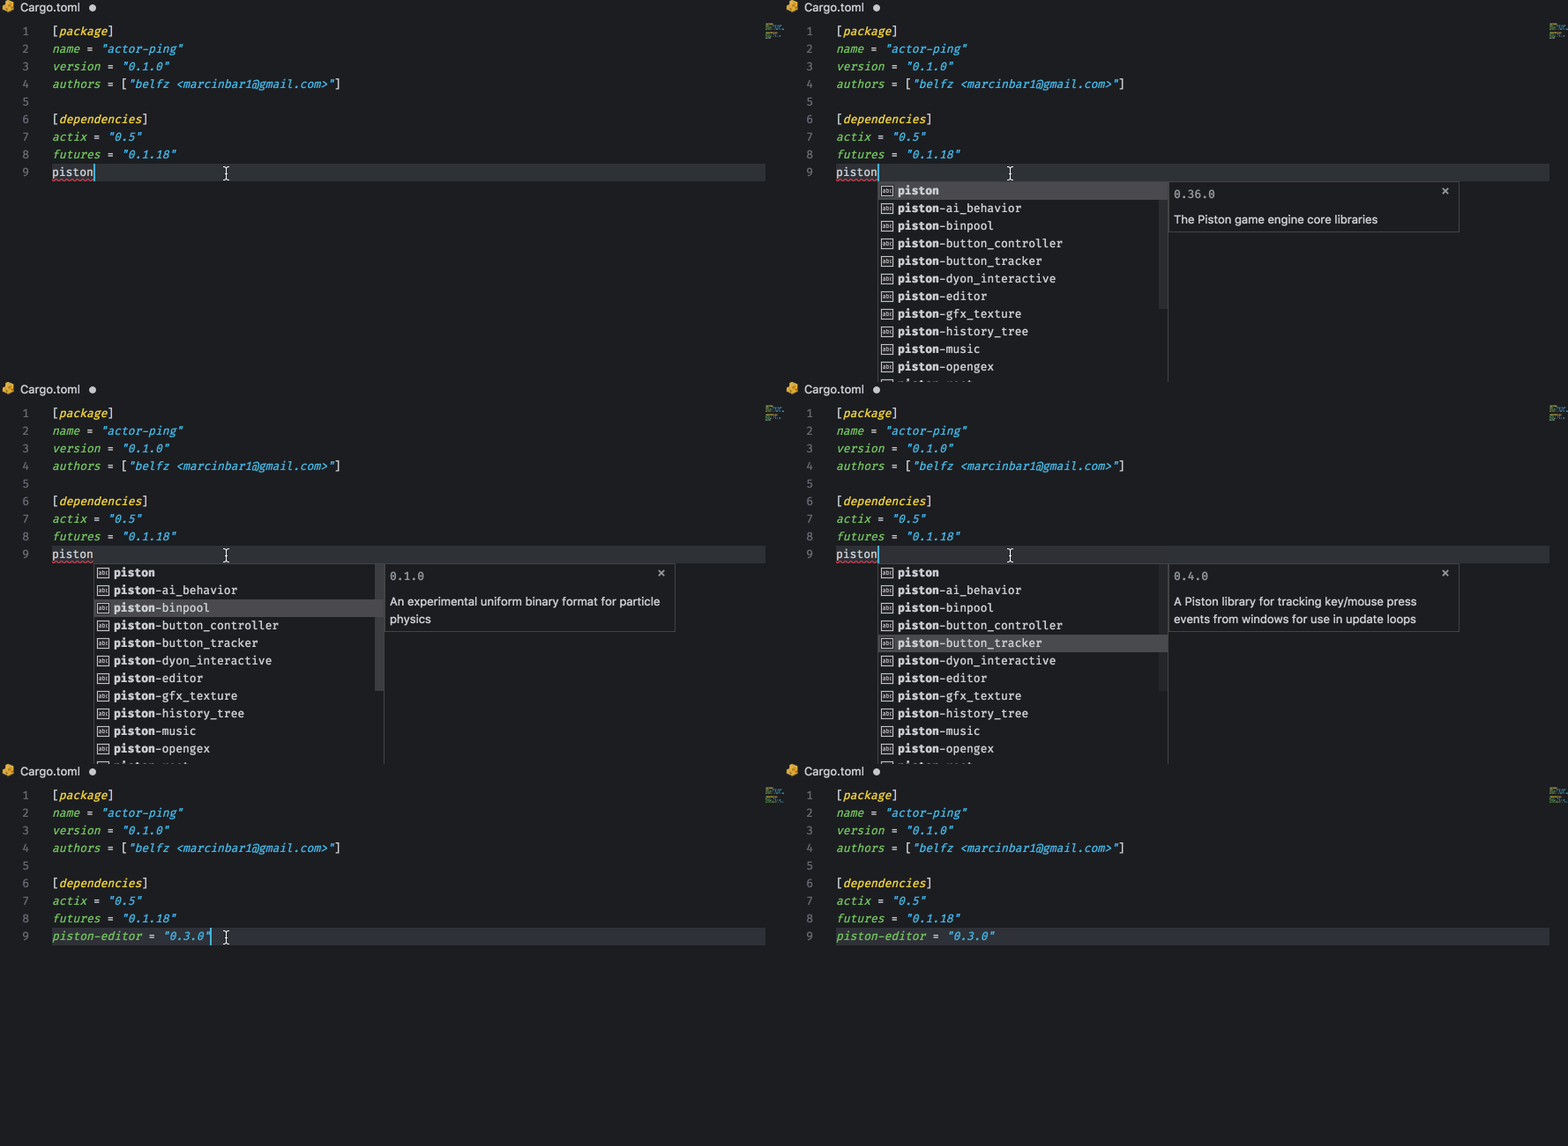
Do you have an idea of a library you want to use but don’t know the version well just type in the name of the library and Search Crates.io will get the version.
Better TOML
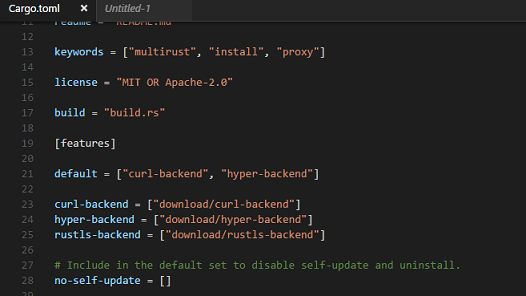
Better TOML adds syntax highlighting to your Cargo.toml.
Cross-compiling with MUSL
To cross-compile with MUSL in Gitpod, you can:
- Run
rustup target add x86_64-unknown-linux-musl, for example in your .gitpod.Dockerfile - Then, build with
cargo build --target x86_64-unknown-linux-musl
To learn more, see MUSL support for fully static binaries.
Debugging
In this section we will show you how to configure your project for debugging in Gitpod.
First, before we get to that we need to get some prerequisites set-up.
First we’ll install the needed extension. If you haven’t already, head over to Gitpod’s Extensions panel (left vertical menu in the IDE) and search for an extension called Native Debug by webfreak. When you see it, click to install it for your project.
The next prerequisite is a Docker configuration.
If you already have a .gitpod.Dockerfile just add the following:
RUN sudo apt-get -q update     && sudo apt-get install -yq         libpython3.6         rust-lldb     && sudo rm -rf /var/lib/apt/lists/*

ENV RUST_LLDB=/usr/bin/lldb-8
If not there are two steps. First, create a file called .gitpod.Dockerfile with the following content:
FROM gitpod/workspace-full

USER gitpod

RUN sudo apt-get -q update     && sudo apt-get install -yq         libpython3.6         rust-lldb     && sudo rm -rf /var/lib/apt/lists/*

ENV RUST_LLDB=/usr/bin/lldb-8
Next, add the following to your .gitpod.yml file:
image:
  file: .gitpod.Dockerfile
Now that thats out of the way, here is a video on how to configure the debug configuration
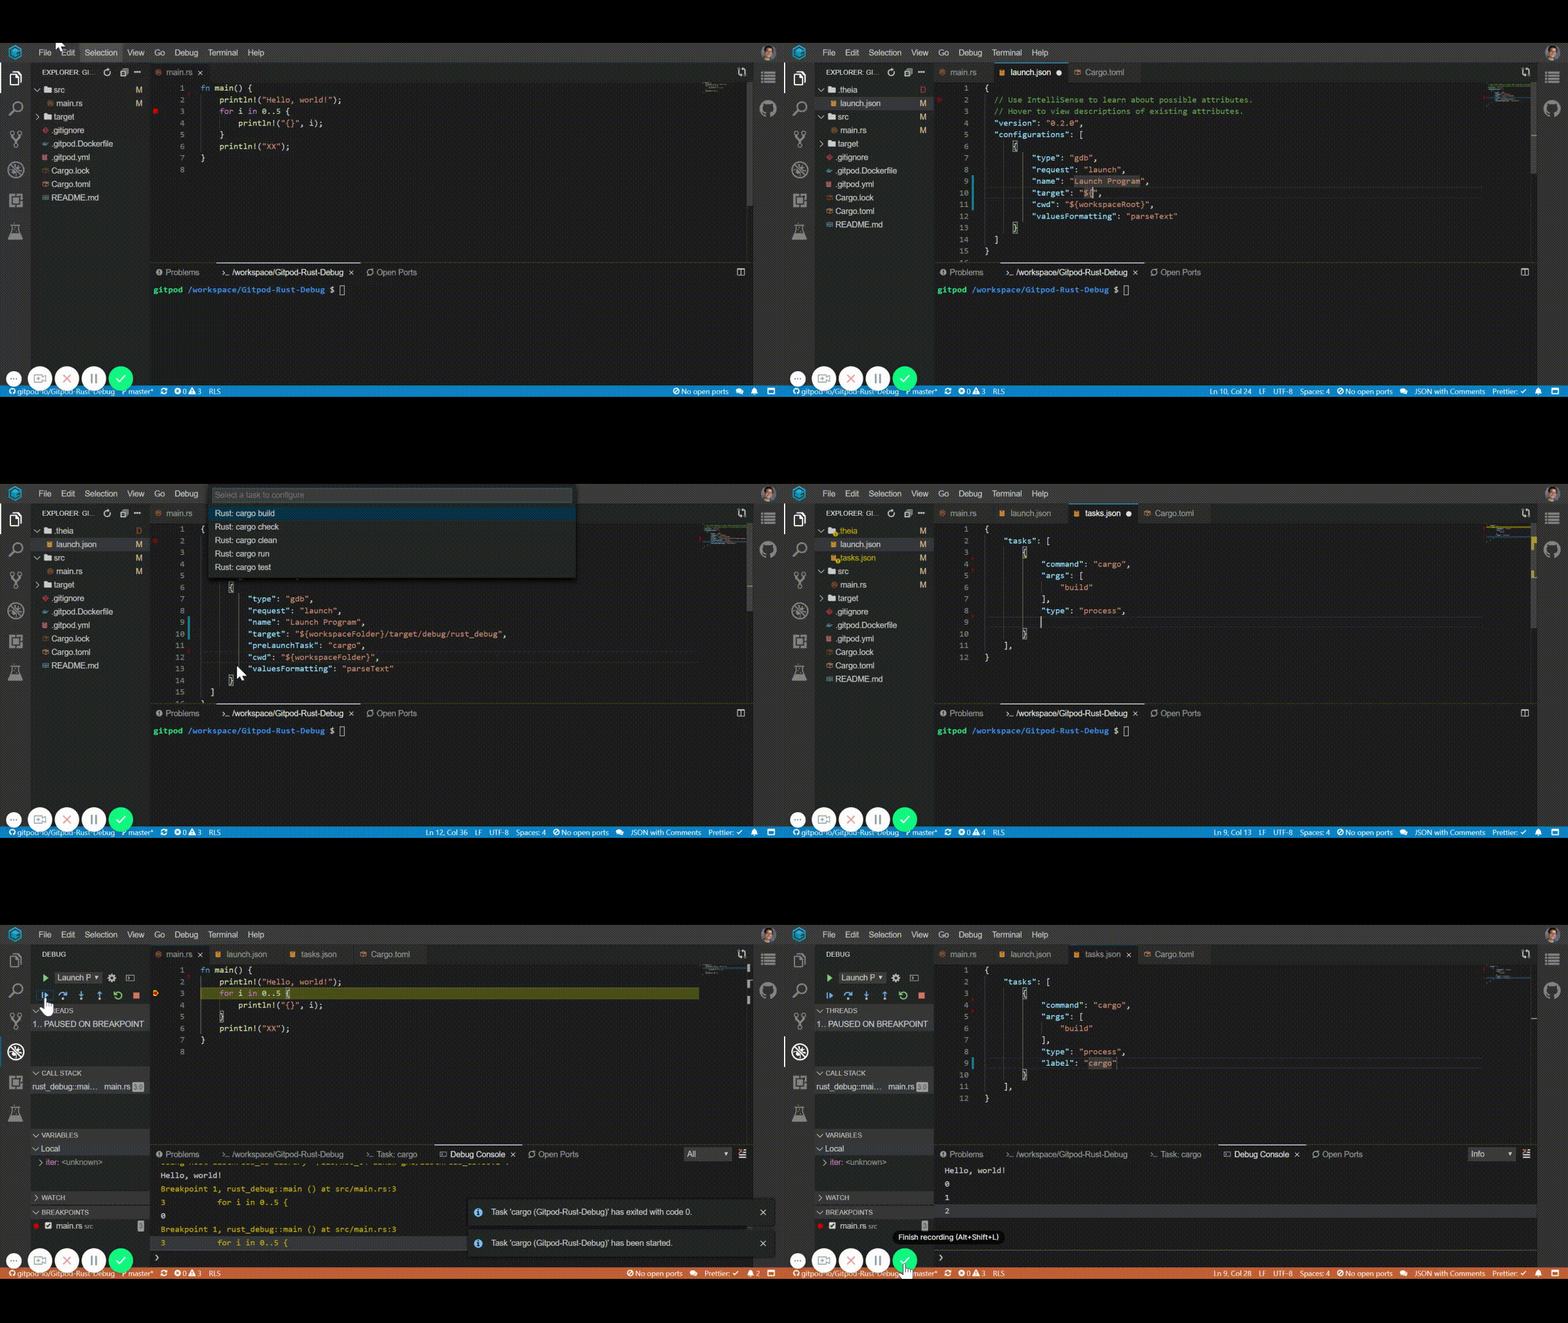
So, basically in this video we:
- Go to the debug menu and select “Add Configuration…”
- Next, in the dropdown choose “GDB: Launch Program”
- Go to the
Cargo.tomlfile and find the name of the program. - Modify the target field and change it to
${workspaceFolder}/target/debug/<PROGRAM_NAME>where<PROGRAM_NAME>is the name of the program under the name field in theCargo.tomlfile. - Add another property to the created file called
preLaunchTaskand set it to “cargo” - Go to the terminal menu and click configure tasks
- Select cargo build from the menu that pops up
- change the tag
typetocommand - change the tag
subcommandtoargsand the value to["build"] - Next remove the
problemMatcherfield. - Add a field called
typeand set it toprocess - Add a field called
labeland set it tocargo - Go to the Rust file you want to debug
- Add a breakpoint or two
- Go back to the debug menu that has the crossed out spider
- Click the green run button.
- Finally, start debugging your Rust program!
You can also create the Rust debug configuration file manually
To start debugging your Rust application in Gitpod, please create a new directory called .theia/, and inside add a file called launch.json, add the following to it:
{
  // Use IntelliSense to learn about possible attributes.
  // Hover to view descriptions of existing attributes.
  "version": "0.2.0",
  "configurations": [
    {
      "type": "gdb",
      "request": "launch",
      "name": "Debug Rust Code",
      "preLaunchTask": "cargo",
      "target": "${workspaceFolder}/target/debug/rust_debug",
      "cwd": "${workspaceFolder}",
      "valuesFormatting": "parseText"
    }
  ]
}
Next create another file in the same .theia/ directory called tasks.json with the following content:
{
  "tasks": [
    {
      "command": "cargo",
      "args": ["build"],
      "type": "process",
      "label": "cargo"
    }
  ]
}
Then, simply open the Rust file you want to debug, add some breakpoints, and open the Debug panel (in the left vertical toolbar, click the icon with the crossed-out-spider), and click the green “Run” button.
To see a basic repository with Rust debugging configured, please check out gitpod-io/Gitpod-Rust-Debug:
Further Reading
- Rocket-Example For an example of how to setup a project for the
Rocketweb-development framework